A Favicon is a small image which is associated with your blog. It is used in many places. For example, most browser, you will see a small icon besides the title of the page. In my case, it shows two letters 'SC'* . By default, Favicon of a Blogger blog is a letter 'B' written in an orange background*.
In this tutorial I'm gonna show you how to set a favicon for your Blogger blog.
STEP 1 : Get your Favicon ready.
You may do this by creating an image with your photoshop or any other means but the dimensions of image should be 16X16 px and the format should be .ico. Or much more easier is to create your Favicon with a free online tool in here. I always prefer the latter method. It is a very simple process to get your image/animation using this tool. Draw as you like and after you finish just click 'Download Favicon' and you will now have your .ico file.
STEP 2 : Go to the layout settings of your blog from blogger. On the upper right corner you will see 'Favicon' setting. Click on edit and a new window will pop up.
STEP 3 : Go ahead and click on 'choose file' and upload your .ico file.
STEP 4 : Now click 'Save' and the window will automatically close.
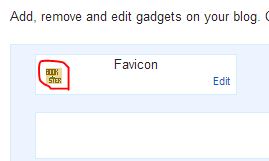
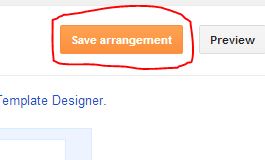
STEP 5 : You will see your favicon in place of the default one on the layout page when the window closes. This means everything is good and you have your very own favicon for your blog now. One last step. Click save arrangement on the upper right corner of your layout page, and 'View Blog' on the upper left.

That's it! You are now good to go with your blog's new favicon!!
Spare a moment to say thanks and motivate me. :)
//Spectracoder
In this tutorial I'm gonna show you how to set a favicon for your Blogger blog.
STEP 1 : Get your Favicon ready.
You may do this by creating an image with your photoshop or any other means but the dimensions of image should be 16X16 px and the format should be .ico. Or much more easier is to create your Favicon with a free online tool in here. I always prefer the latter method. It is a very simple process to get your image/animation using this tool. Draw as you like and after you finish just click 'Download Favicon' and you will now have your .ico file.
STEP 2 : Go to the layout settings of your blog from blogger. On the upper right corner you will see 'Favicon' setting. Click on edit and a new window will pop up.
STEP 3 : Go ahead and click on 'choose file' and upload your .ico file.
STEP 4 : Now click 'Save' and the window will automatically close.
STEP 5 : You will see your favicon in place of the default one on the layout page when the window closes. This means everything is good and you have your very own favicon for your blog now. One last step. Click save arrangement on the upper right corner of your layout page, and 'View Blog' on the upper left.


That's it! You are now good to go with your blog's new favicon!!
Spare a moment to say thanks and motivate me. :)
//Spectracoder


